Mounting, Connections, and Installation
Mechanical Installation
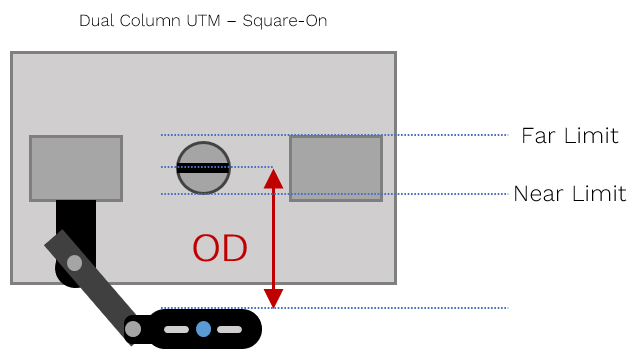
Select an appropriate setup arrangement
Depending on the UTM used.For round column adaptors, contact your supplier.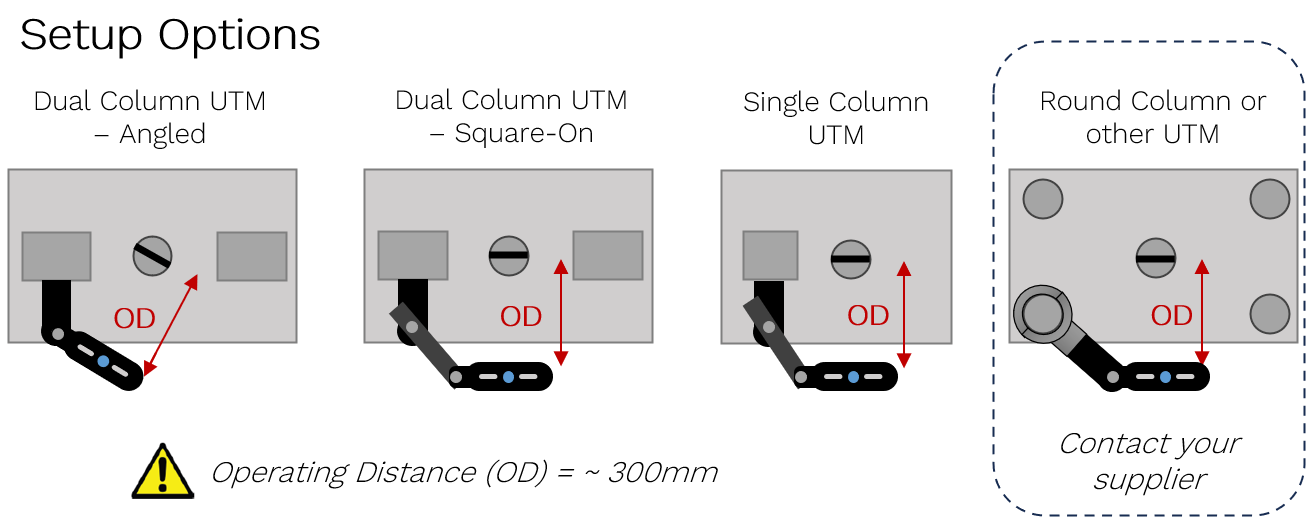 Vector can be positioned to allow easy access to the load train.Ensure the Operating Distance (OD) is correct for the Vector variant used.
Vector
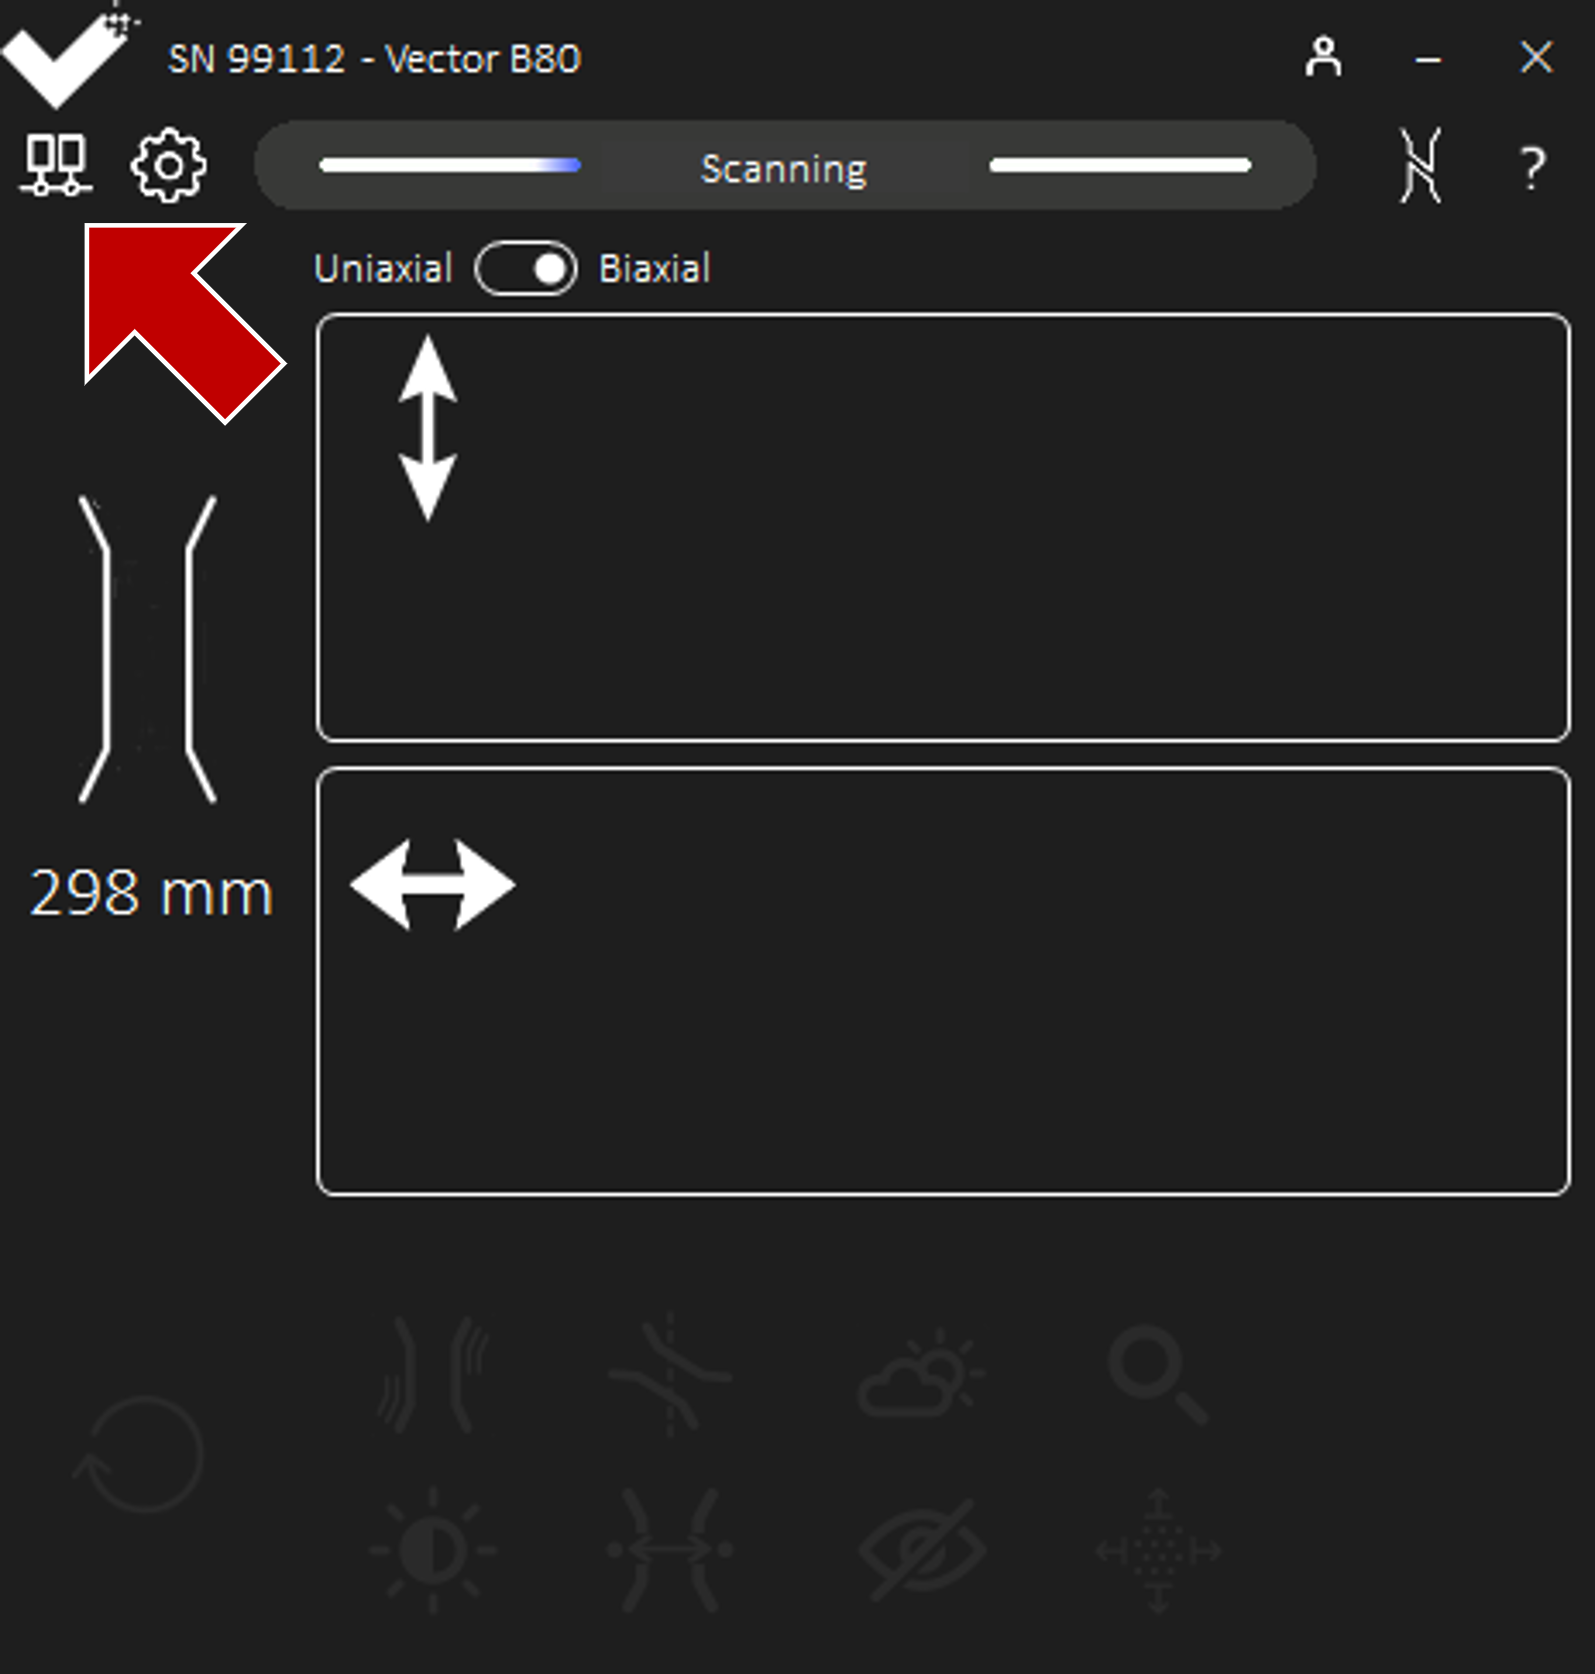
Operating Distance (mm)
U200
250 - 350
U70
280 - 320
B80
285 - 315
Mount Rail onto UTM
Using the 4x M6 T-nuts and 4x M6 x 20mm buttonhead hex bolts.
Ensure the Rail is aligned to the load train by pressing it up against one edge of the frame T-slots.
Ensure the endstop bolts are at the base of travel.
Do not mount over limitstops.
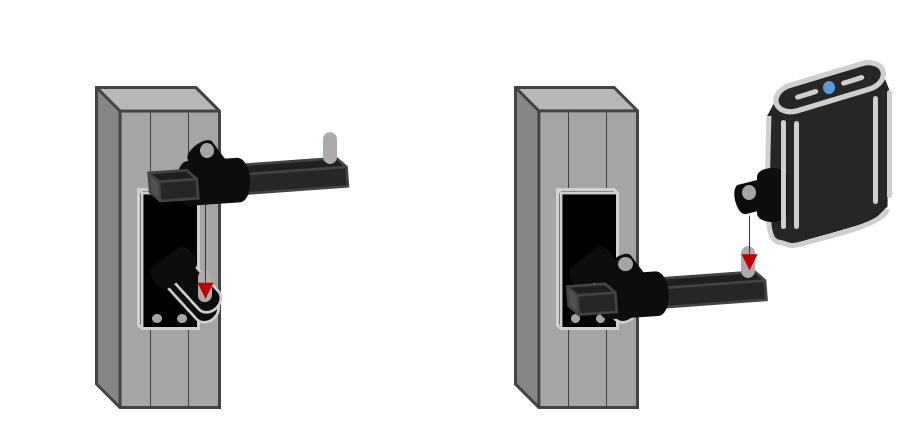
Slide Mounting Stub onto Rail
Release the locking lever and slide down from the top.
Secure in position using the locking levers.
To adjust pressure, rotate the M4 hex barrel nut.
Secure Intermediary onto Extensometer
Using 2x M6 x 35mm caphead hex bolts.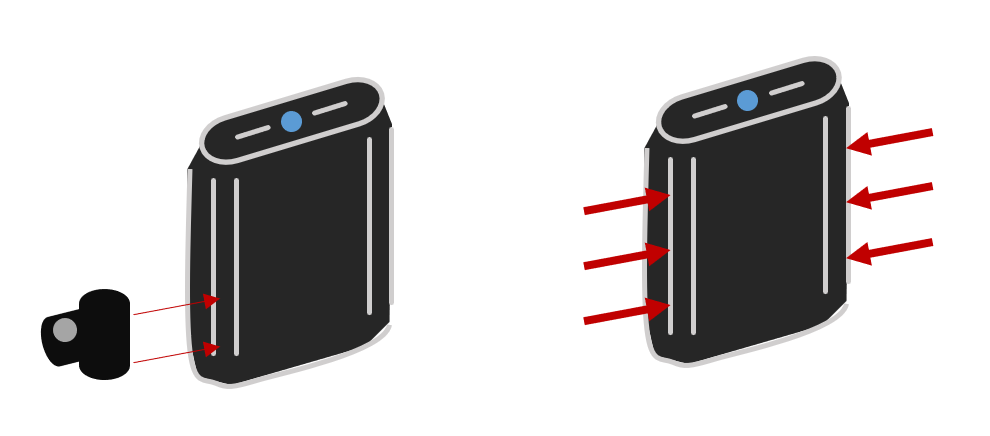 The intermediary can be secured in one of six positions, depending on the setup required.
Mount Extensometer
Either: a. Slide Extensometer onto Mounting StubRelease the locking lever and slide down.
Secure in position using the locking levers.
To adjust pressure, rotate the M4 hex barrel nut.

Slide Extension Arm onto Mounting Stub, followed by Extensometer
Release the locking lever and slide down.
Information

The extension arm can be configured to allow the unit to be mounted to the left or right side of the universal test machine frame.
Warning

When adjusting the arm reach, ensure Vector is fully supported and that the arm does not pull fully through the clamp.
Confirm the clamp is locked once in position.
Warning
When adjusting the arm reach, ensure Vector is fully supported and that the arm does not pull fully through the clamp.
Confirm the clamp is locked once in position.
Electrical Installation

Connecting Digital Output
Controller |
Set-up Details |
Tinius Olsen VMC |
|
Doli |
Connecting Analogue Output
Information
Vector B80 is supplied with a cable providing two analogue outputs. The coloured connector signifies the axial measurement.
Information
Vector is supplied with a suitable AC power supply that ensures safe and proper operation with appropriate grounding. Only use the provided power supply connected to a suitable 3-pin grounded socket
Vector Interface

Warning
It is not advised to connect Vector to a broader LAN, via a switch, hub, or otherwise.