Specimen Marking

Overview

Vector measures strain or extension via markings applied to the specimen.
There are three mark types: Rings, Filled Circles, and Speckles.
The mark type used depends on specimen geometry and Vector variant.
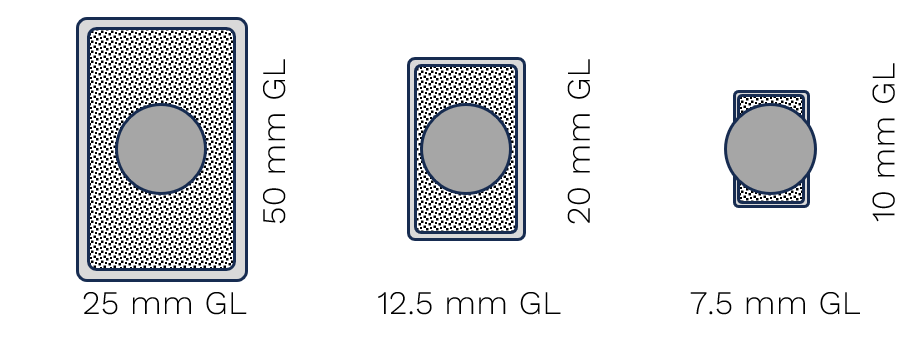
_images/ringdotUses.png _images/speckleUses.png

Vector

Flats Using Rings or Filled Circles

Flats Using Speckles

Rounds Using Speckles

U200

W ≥ 8 mm

W ≥ 5 mm

Ø ≥ 6 mm

U70

W ≥ 4 mm

W ≥ 2 mm

Ø ≥ 2.5 mm

B80

W ≥ 4 mm when axial
W ≥ 10 mm when transverse
W ≥ 1.5 mm when axial
W ≥ 10 mm when transverse
Ø ≥ 2 mm when axial
Ø ≥ 12.5 mm when transverse
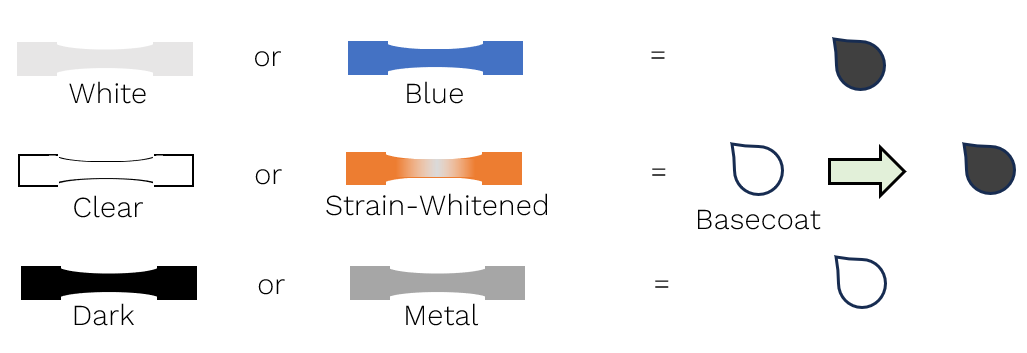
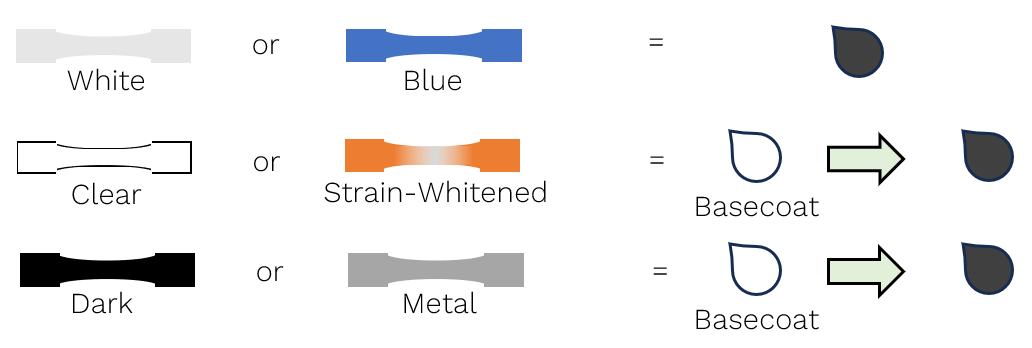
The ink choice and preparation depend on the Vector variant, material appearance and behaviour.
_images/Materialstampu200.png

Warning

warning

Ensure that the correct marking kit is used with each Vector variant

Marking with Rings and Circles

Circles are filled ring markings. The diameter of the ring varies with the Vector variant.

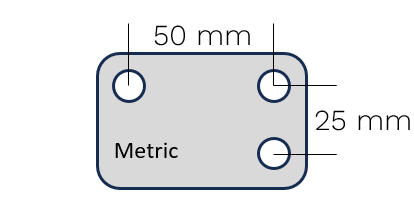
Kit - U200

_images/ringdotKit_U200.png

Kit - U70

_images/ringdotKit_U70.png

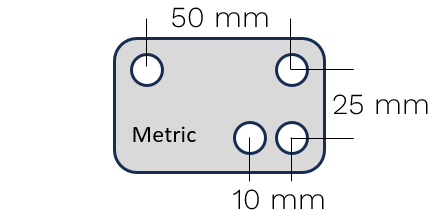
Kit - B80

_images/ringdotKit_B80.png

Uses

Geometry
_images/ringdotUses.png

Vector

Using Rings or Filled Circles

U200

W ≥ 8 mm

U70

W ≥ 4 mm

B80

W ≥ 4 mm when axial
W ≥ 10 mm when transverse

Appearance

_images/MaterialPenu200.png

Preparation

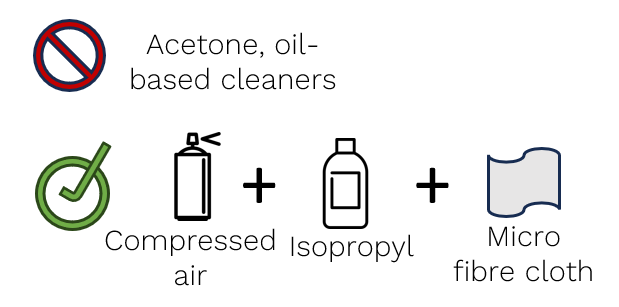
  1. Clean specimen to remove grease and dust

    _images/specimenPrepare.png
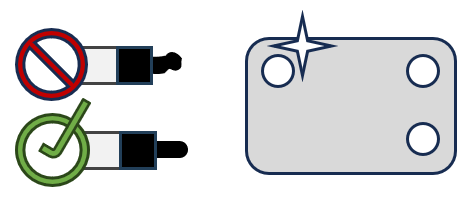
  2. Ensure stencil is clean and pen nib is true.

    _images/ringdotPrepare.png
Worn nibs can be removed and reversed for extended use.
See section on Maintenance of Vector Marking Kit for more information.

Warning

warning

Do not touch reduced section of specimen once cleaned.

Application

For high-straining applications, filled circles are preferred.
_images/ringvsdot.png
Select stencil orientation for gauge length.
Using Vector U200
_images/stencilOrientationu200.png
Using Vector U70 or B80
_images/stencilOrientationu70.png
Using B80 in transverse
_images/B80Stencils.png
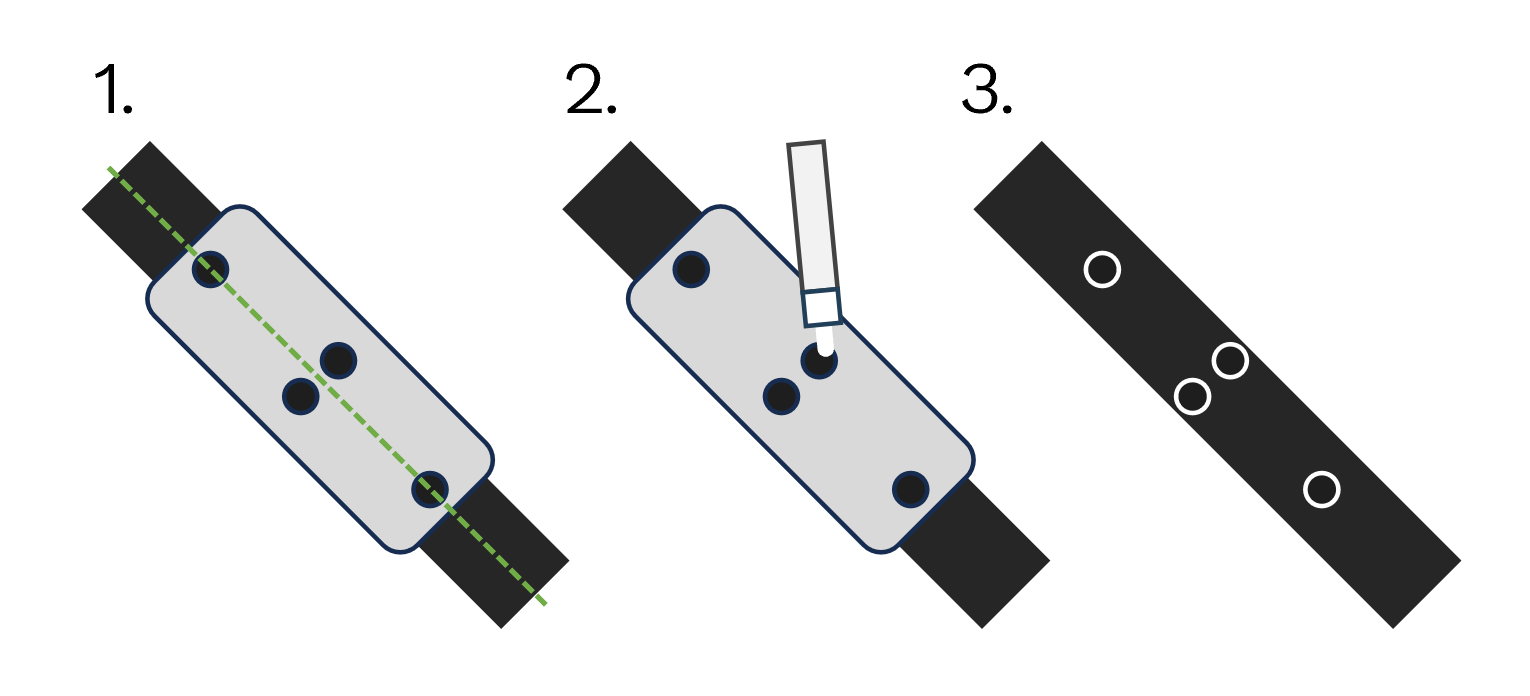
  1. Align stencil to reduced section of specimen.

  2. Evenly draw markings.

  3. Remove stencil.
    Take care to avoid smudging the markings.
    _images/ringdotApplication.png
    The B80 Combined Stencil works in a similar way.
    _images/B80ringApplication.png

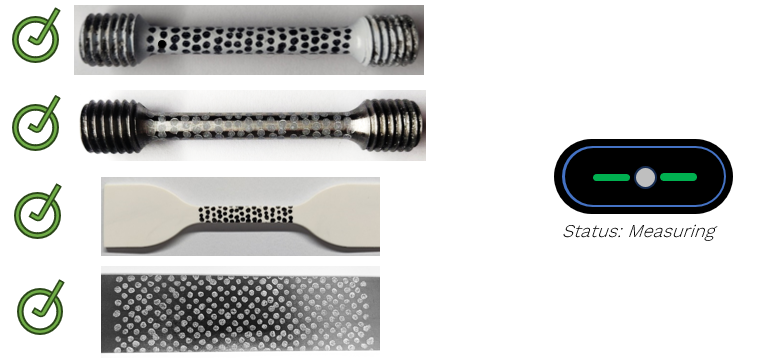
Examples for U200

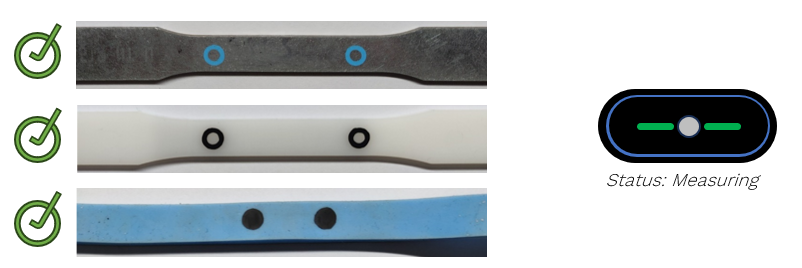
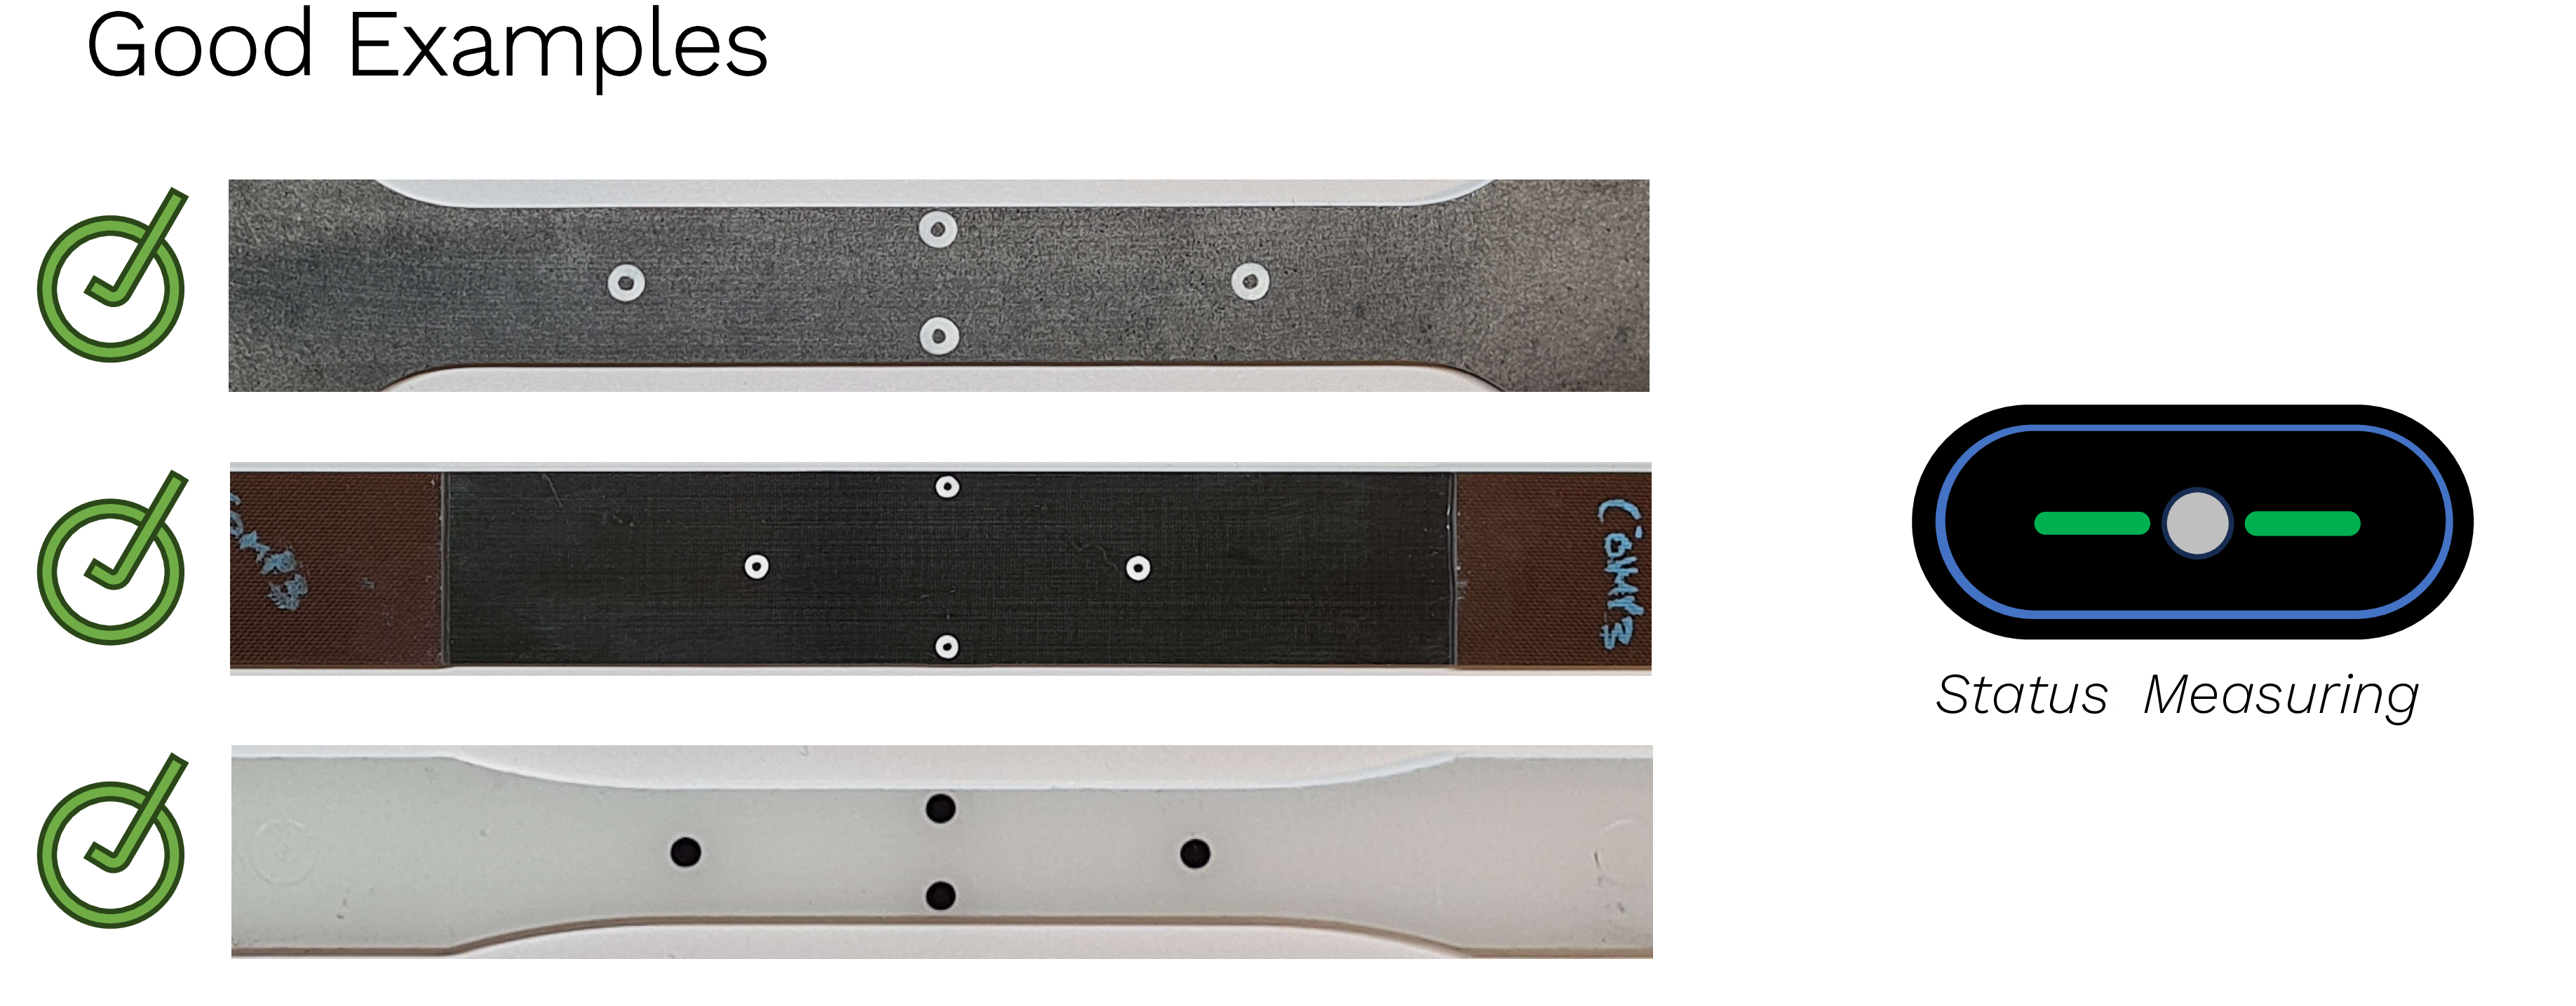
Good Examples

_images/ringdotGoodu200.png

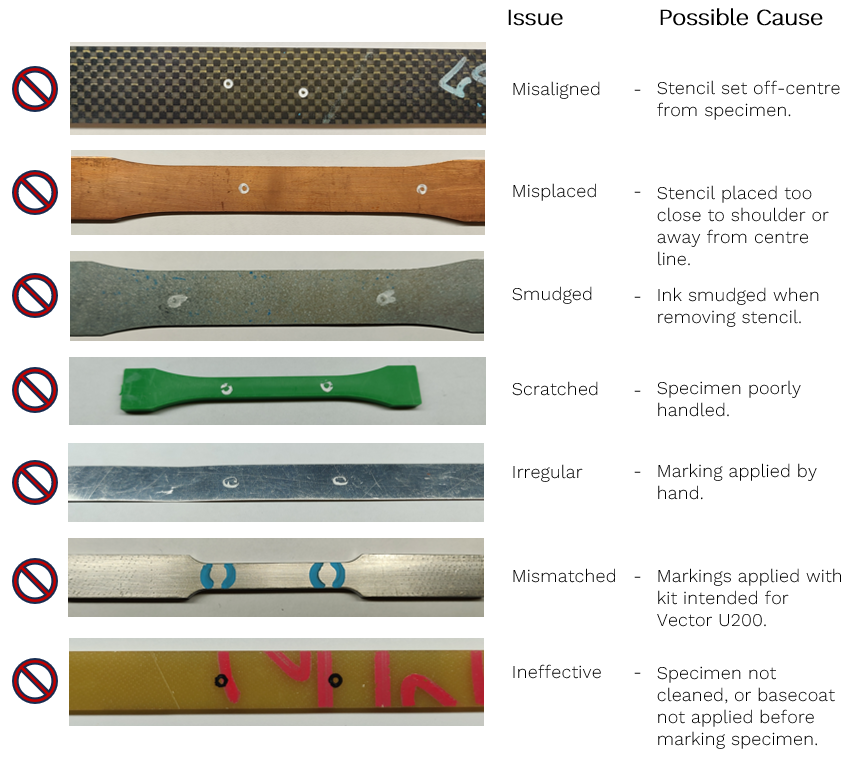
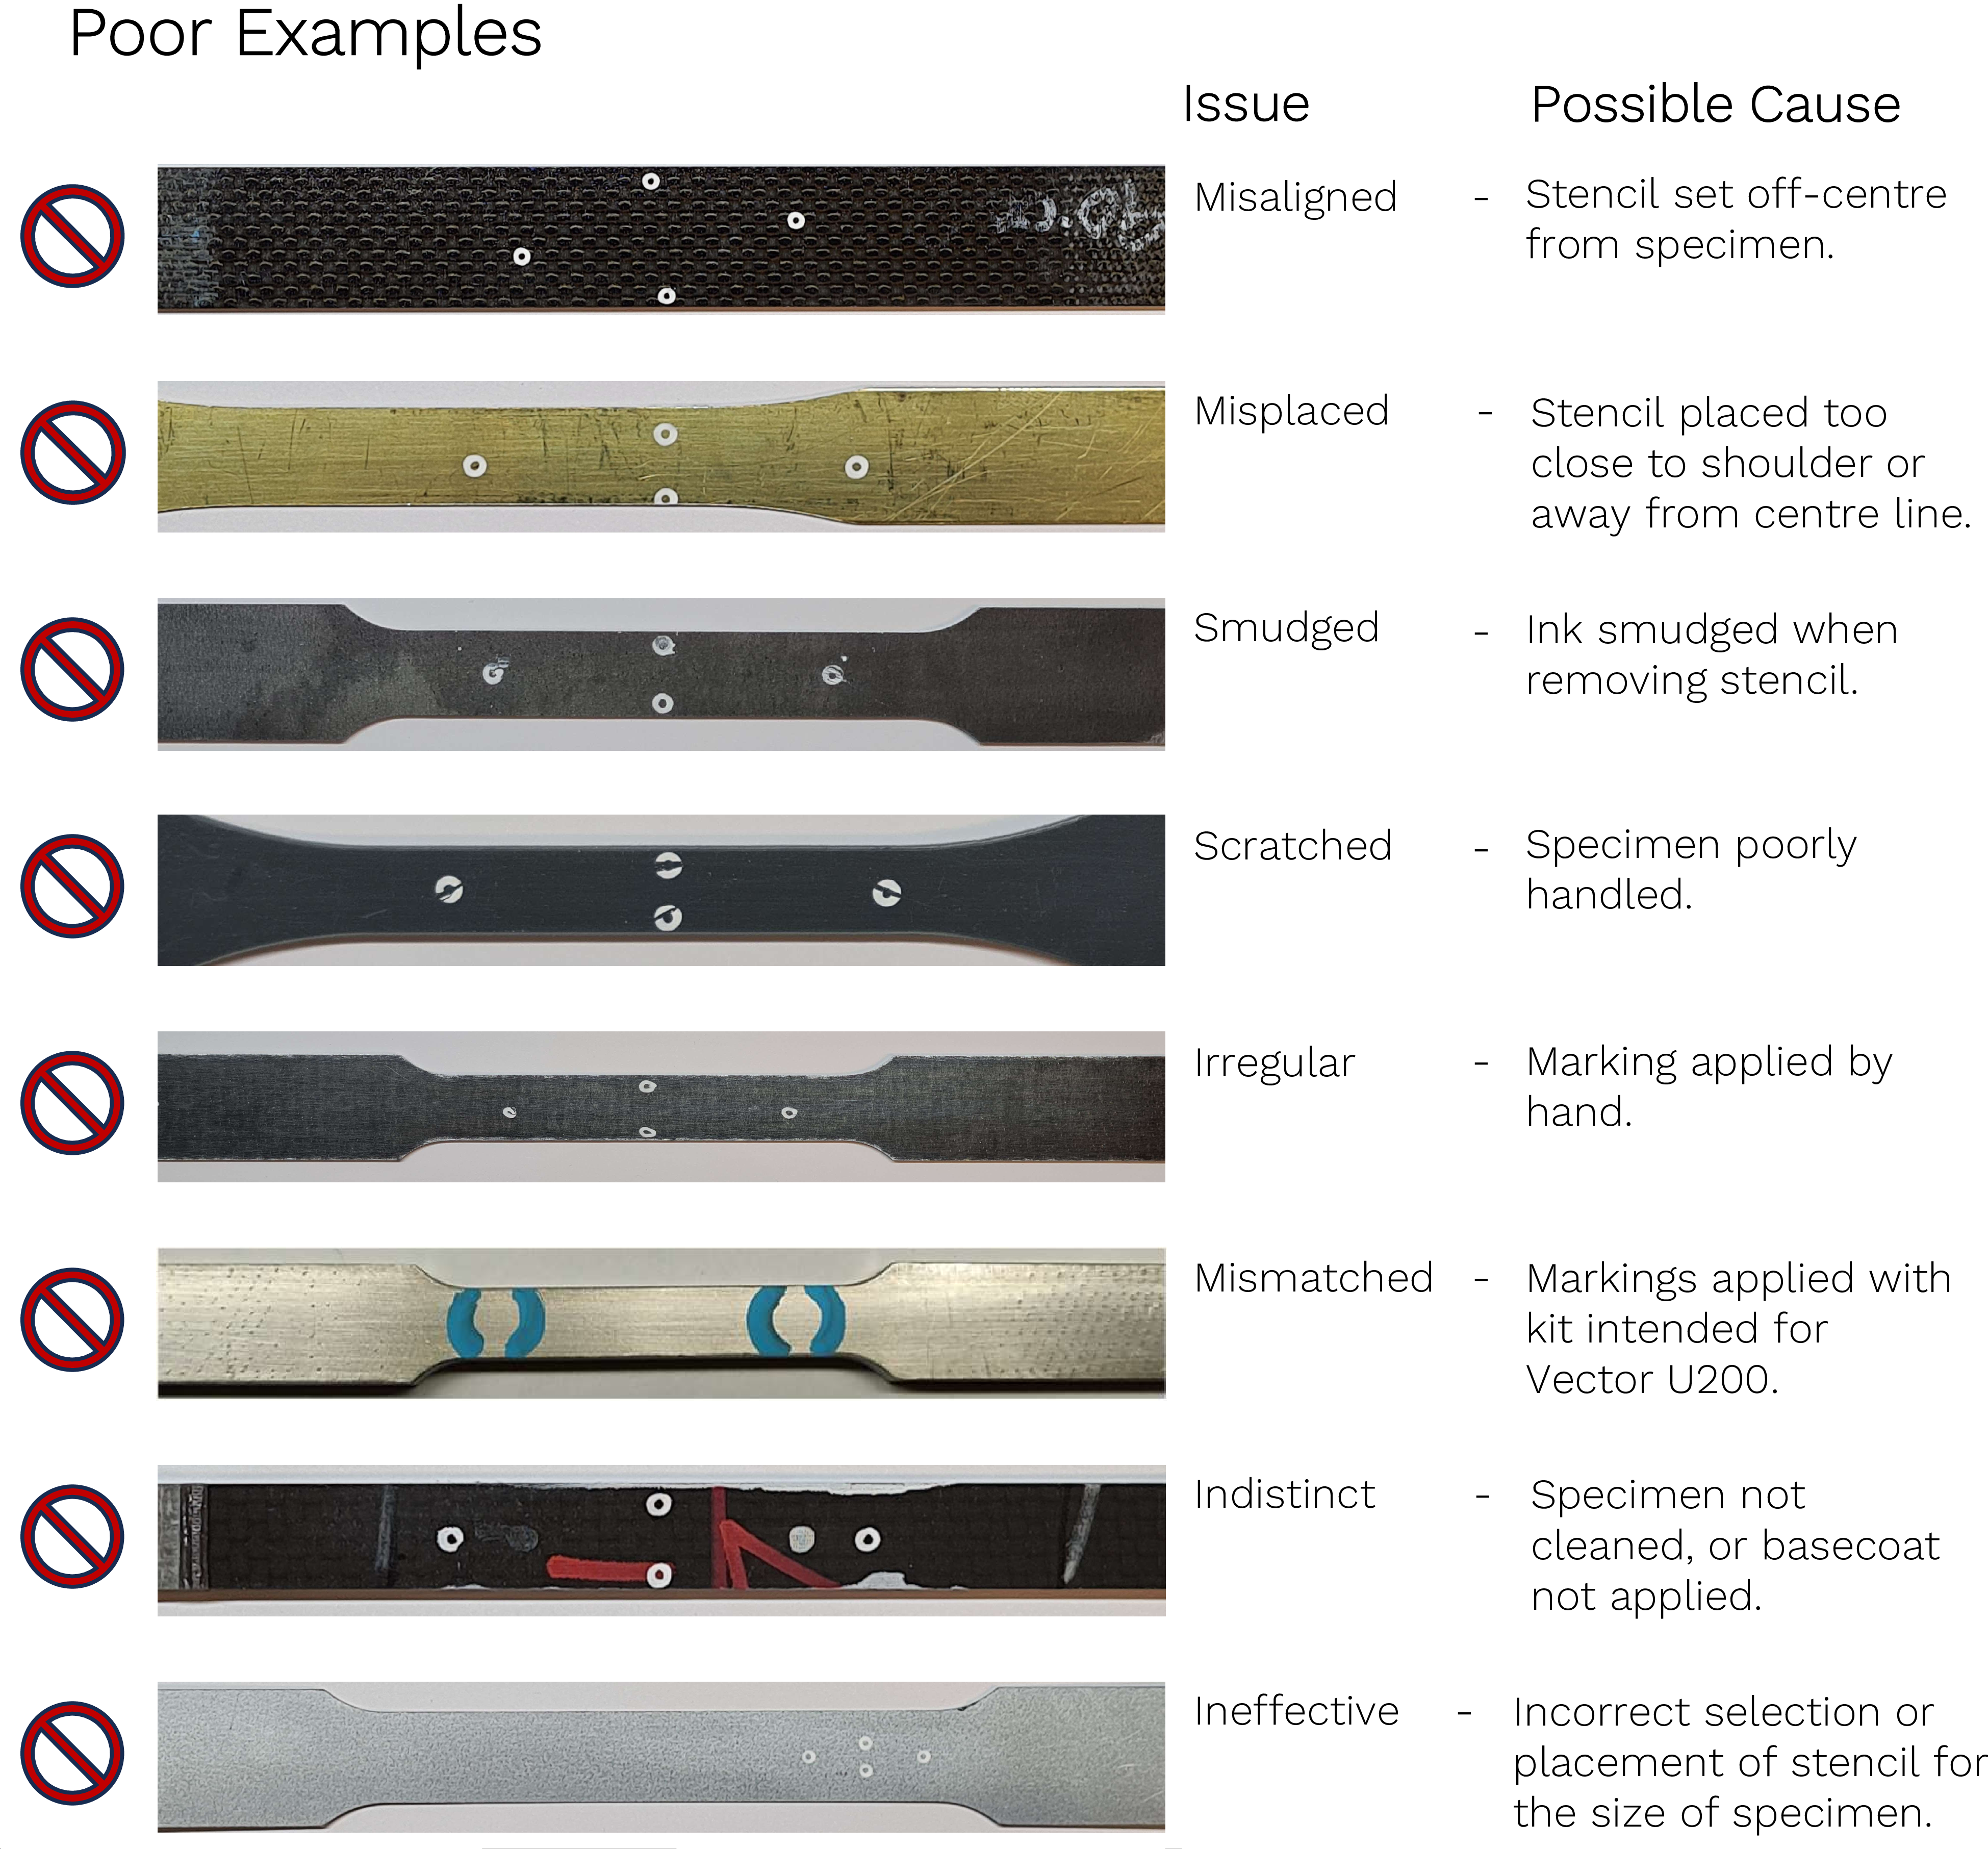
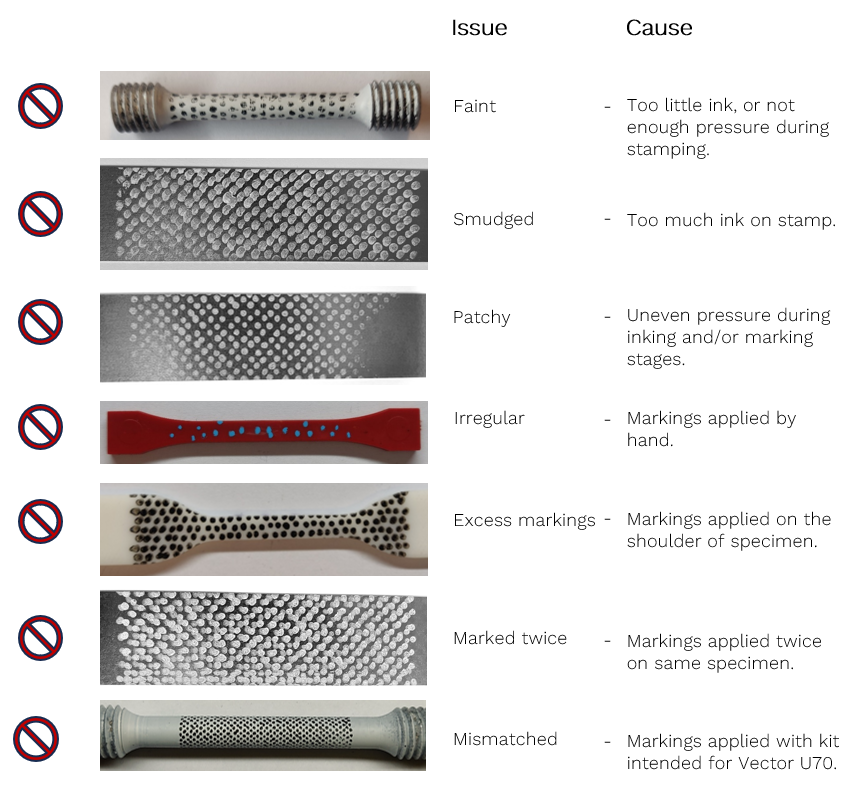
Poor Examples

_images/ringdotPooru200.png

Examples for U70

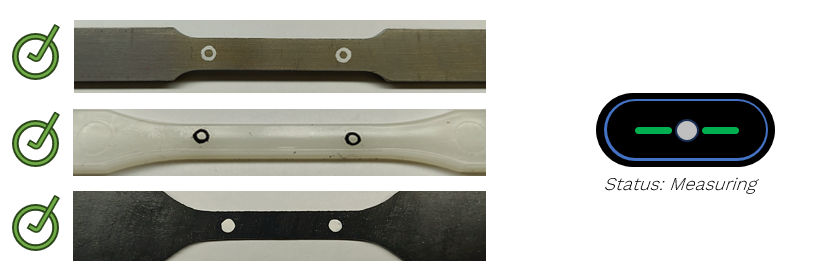
Good Examples

_images/ringdotGoodu70.png

Poor Examples

_images/ringdotPooru70.png

Examples for B80

Good Examples

_images/ringdotGoodb80.png

Poor Examples

_images/ringdotPoorb80.png

Marking with Speckles

Kit

_images/speckleKit.png

Uses

Geometry
_images/speckleUses.png

Vector

Flats Using Speckles

Rounds Using Speckles

U200

W ≥ 5 mm

Ø ≥ 6 mm

U70

W ≥ 2 mm

Ø ≥ 2.5 mm

B80

W ≥ 1.5 mm when axial
W ≥ 10 mm when transverse
Ø ≥ 2 mm when axial
Ø ≥ 12.5 mm when transverse

Appearance

Using Vector U200
_images/Materialstampu200.png
Using Vector U70
_images/Materialstampu70.png
Using Vector B80
_images/Materialstampu70.png

Preparation

  1. Clean specimen to remove grease and dust

    _images/specimenPrepare.png
  2. Ensure stamp is free from a build-up of ink or debris.

    _images/stampPrepare.png

Place stamp on top of ink pad between marking specimens

_images/stampOnPad.png

Information

info
For new stamps:
Clean and check that the stamp is clean and grease free.
Then apply speckle marks onto scrap material several
times to prime stamp for general use.

Warning

warning

Do not touch reduced section of specimen once cleaned.

Application

  1. Prepare work area.

    Place a clean sheet of paper under specimen before stamping.

  2. Prepare specimen.

    Apply a basecoat, if required, using the contrasting ink.

  3. Select Stamp Orientation for Gauge Length.

Using Vector U200
_images/stampOrientationu200.png
Using Vector U70
_images/stampOrientationu70.png
Using Vector B80
_images/stampOrientationb80.png
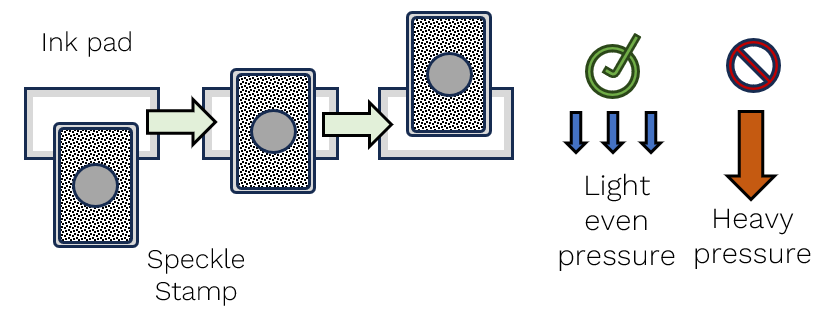
  1. Ink Stamp.

    Light even pressure.

    _images/inkPressure.png
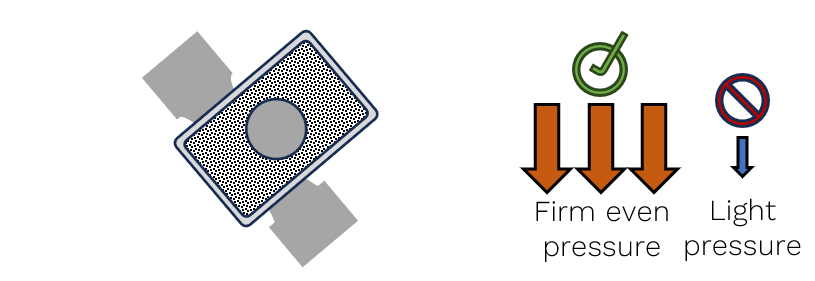
  2. Apply stamp to specimen.

    Firm even pressure.

    _images/stampPressure.png

Information

info

Allowing for the ink to dry slightly on the stamp before applying will minimise the likelihood of slipping.

Information

info

A crisp ‘peeling’ sound when removing stamp from specimen is a good indicator that the speckle pattern has been applied effectively.

Warning

warning

Ensure that entire stamp pad is evenly coated in ink.

Application Technique

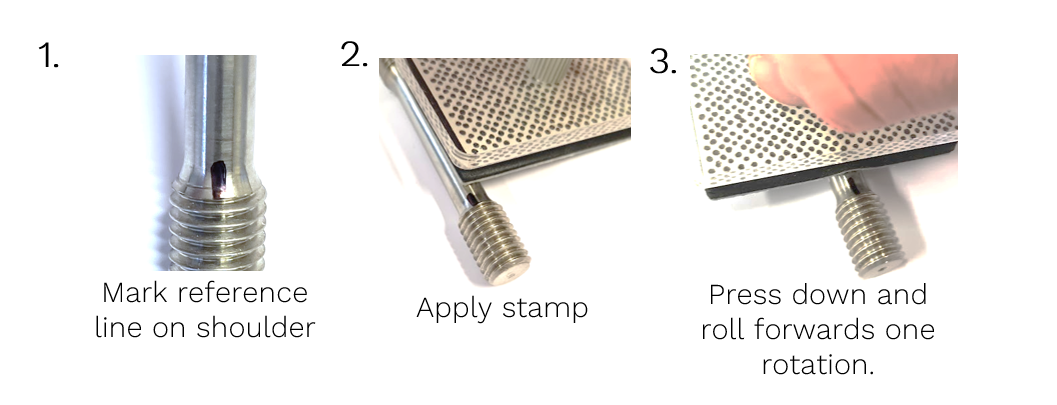
For best results, vary the technique based on the geometry of specimen.
Flat Specimens
_images/stampFlat.png
Round Specimens
_images/stampRound.png
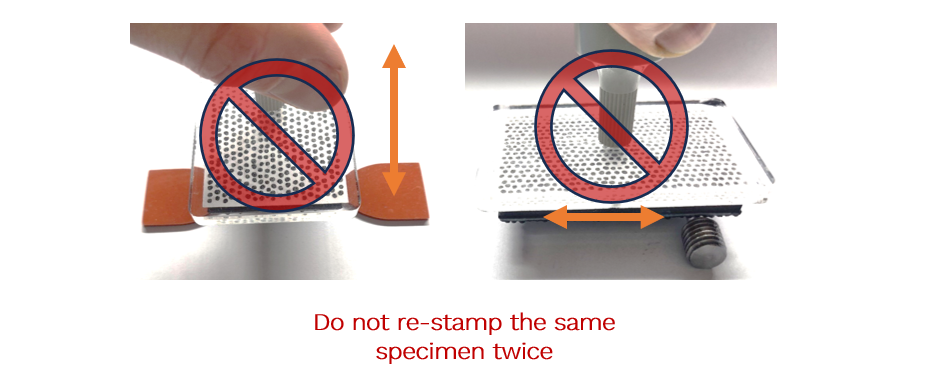
Take care to not roll stamp over existing speckle markings.
_images/doublestamp.png

Examples for U200

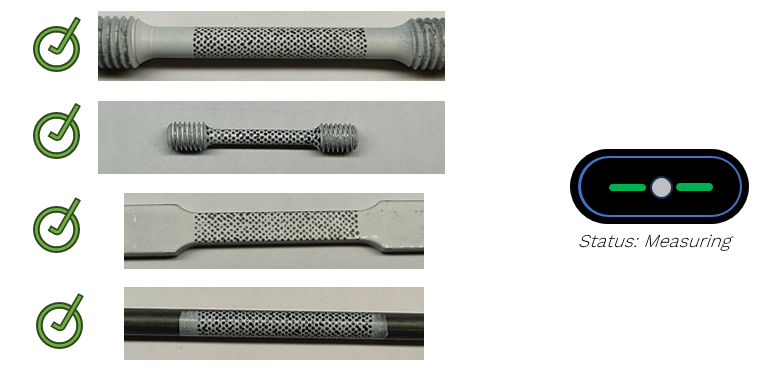
Good Examples
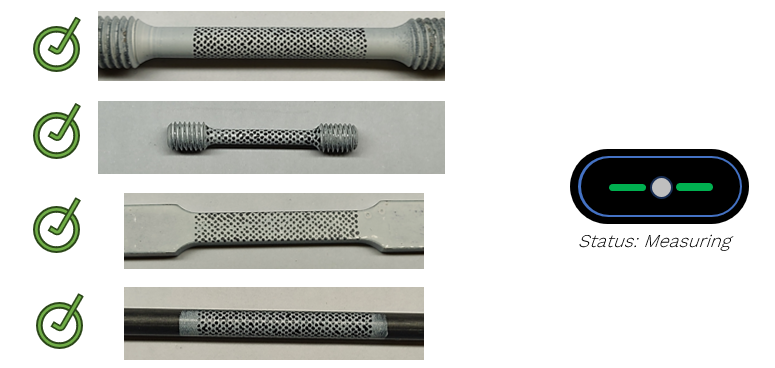
Good speckle patterns consist of high contrast speckles, with evenly inked blots covering a large area of the specimen.
_images/speckleGoodu200.png

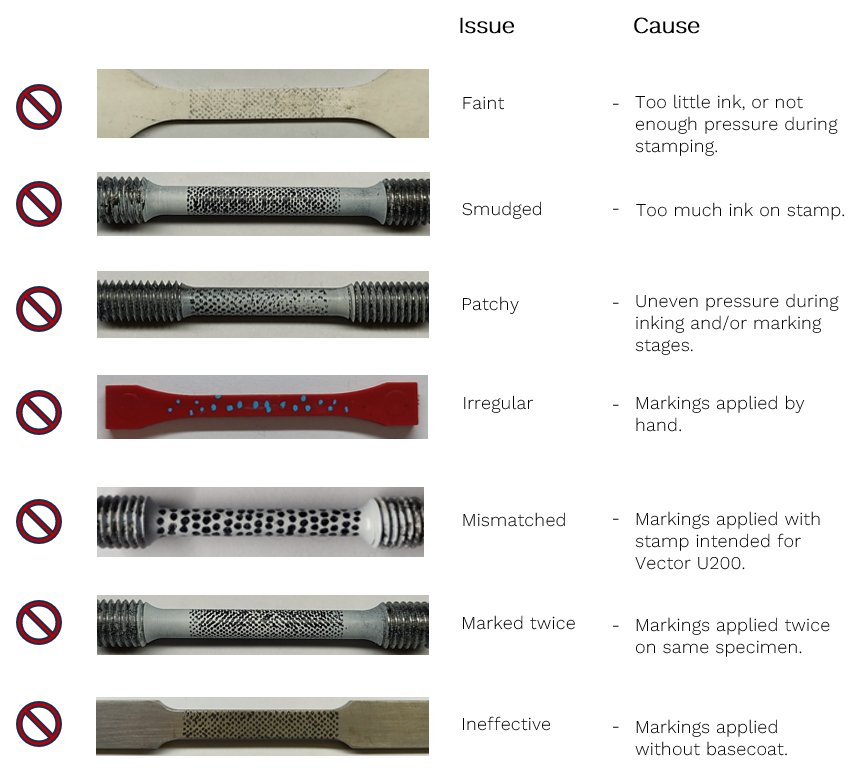
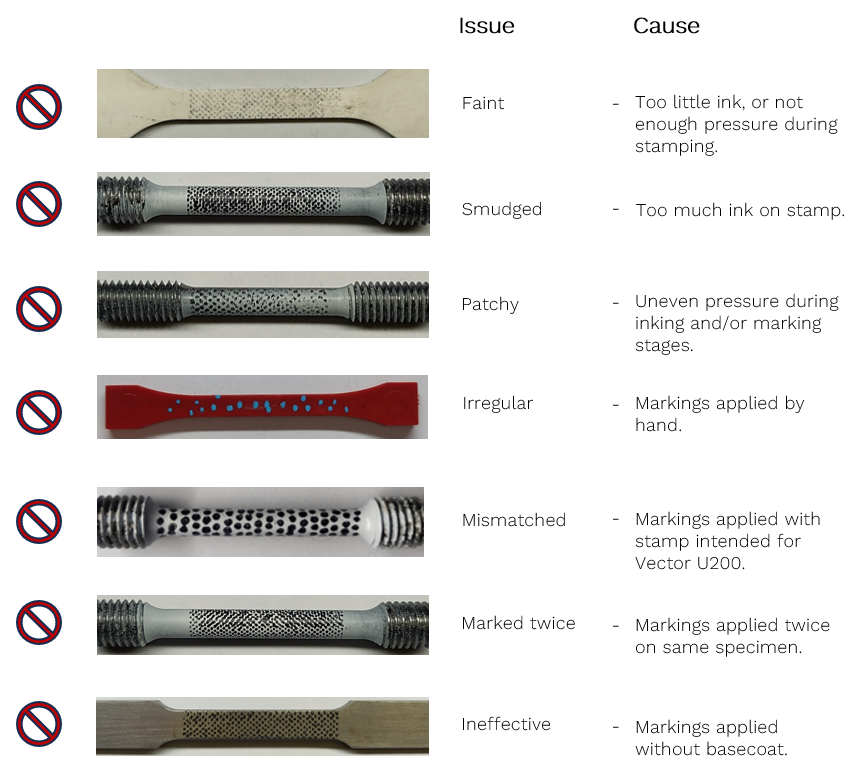
Poor Examples
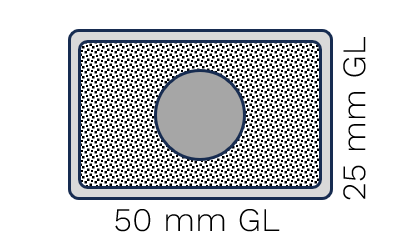
_images/specklePooru200.png

Examples for U70

Good Examples
Good speckle patterns consist of high contrast speckles, with evenly inked blots covering a large area of the specimen.
_images/speckleGoodu70.png

Poor Examples
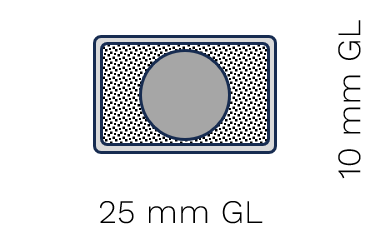
_images/specklePooru70.png

Examples for B80

Good Examples
Good speckle patterns consist of high contrast speckles, with evenly inked blots covering a large area of the specimen.
_images/speckleGoodb80.png

Poor Examples
_images/specklePoorb80.png